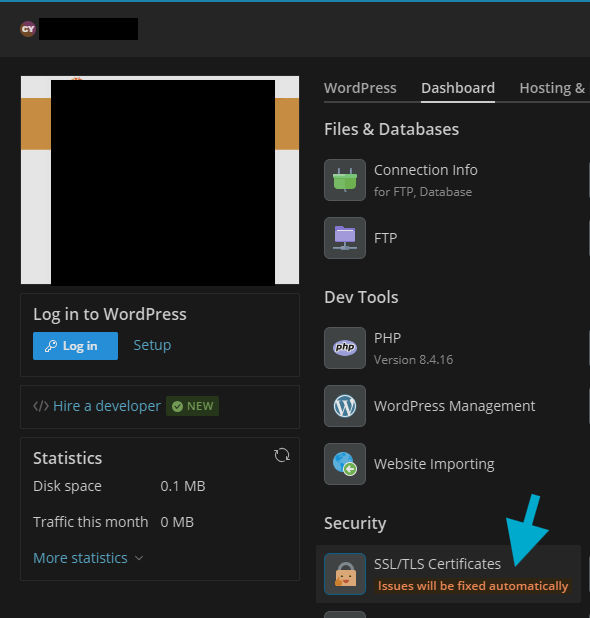
Overview
As part of our hosting platform migration, some websites may require a different SSL certificate setup when using Cloudflare proxying (orange cloud enabled).
If your domain is proxied through Cloudflare, standard automatic SSL issuance (such as Let’s Encrypt inside the hosting control panel) may fail. To ensure your site remains secure and functional, you may need to install a Cloudflare Origin CA certificate on your hosting account.
This article explains why this happens and how to resolve it.
Why Let’s Encrypt May Fail on Cloudflare-Proxied Domains
When Cloudflare proxying is enabled, Cloudflare may publish IPv6 (AAAA) DNS records automatically.
This can interfere with automatic certificate issuance because the certificate authority must validate your domain by reaching your server directly. When the validation traffic is routed in unexpected ways (or hits Cloudflare instead of your origin), the validation fails and the certificate cannot be issued.
This is a known issue in certain hosting environments when combining:
Cloudflare proxying (orange cloud)
IPv6 / AAAA records
Automated certificate issuance (ACME / Let’s Encrypt)
Recommended Fix: Use a Cloudflare Origin CA Certificate
A Cloudflare Origin CA certificate is designed specifically to secure traffic between:
Cloudflare (edge) → Your web server (origin)
With this setup:
Visitors still see a normal trusted HTTPS certificate in their browser (served by Cloudflare)
Your origin server has a certificate that Cloudflare trusts
You can use Full (Strict) SSL mode in Cloudflare
Important: Cloudflare Origin CA certificates are not publicly trusted by browsers if someone connects directly to your origin server. They are intended only for sites that remain proxied through Cloudflare.
Step 1 — Create a Cloudflare Origin CA Certificate
If you are a managed website/hosting client, we may provide you with a Certificate Signing Request. If we did, please provide the CSR to Cloudflare instead of generating a private key and certificate.
For full Cloudflare instructions, see this article.
Log in to Cloudflare and select your website/domain.
Go to the SSL/TLS settings area.
Find the section for Origin Server / Origin Certificates.
Click Create Certificate.
Choose the option to generate a private key and certificate (recommended, unless the above note applies to you).
Add hostnames:
example.com*.example.com(wildcard)
Choose the certificate validity period.
Create the certificate.
Save BOTH of the following items somewhere safe:
The Origin Certificate (certificate text)
The Private Key (key text)
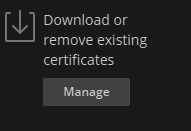
Step 2 — Install the Origin Certificate in Your Hosting Control Panel (Plesk)
If you are a managed website/hosting client, we can load this certificate for you. Please open a ticket, or reply to the ticket in which we requested this information. You will need to provide both the private key and certificate.
Log in to your hosting control panel.
Navigate to your domain’s SSL/TLS Certificates area.
Click "Manage" under "Download or remove existing certificates."
Click Add SSL/TLS Certificate.
Name it something like:
Cloudflare Origin CA - example.com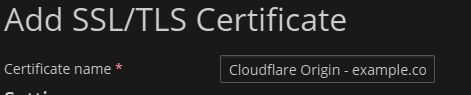
Scroll down to "Upload the certificate as text" and Paste in the required values:
Private Key: paste the private key from Cloudflare
Certificate: paste the origin certificate from Cloudflare
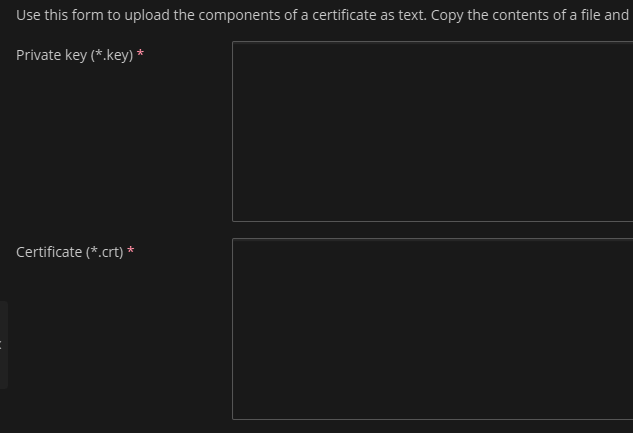
Save/upload the certificate.
Step 3 — Assign the Certificate to Your Website
Go to your domain’s Hosting Settings (or equivalent).
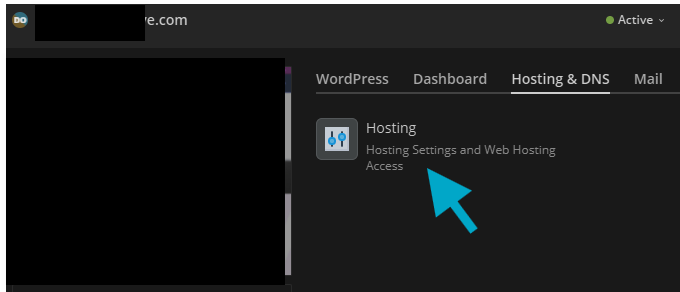
Locate the Security / SSL certificate dropdown.
Select the newly added Cloudflare Origin CA certificate.
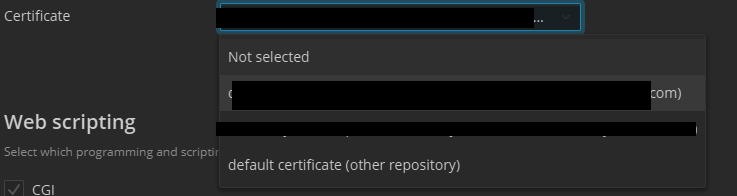
Save/apply changes.
Step 4 — Confirm Cloudflare SSL Mode
After the certificate is installed on your hosting account:
Go back to Cloudflare for your domain.
Set SSL/TLS encryption mode to:
Full (Strict)
This ensures Cloudflare will encrypt traffic to your server and validate the certificate properly.
Important Notes / Gotchas
1) Do Not Pause Cloudflare (Unless You Replace the Cert)
If you pause Cloudflare or disable proxying (gray cloud), visitors may see certificate warnings because the Origin CA certificate is not publicly trusted.
If you need to turn off proxying later, you should switch to a publicly trusted certificate at the origin (such as Let’s Encrypt or a commercial SSL cert).
2) This Only Covers Web Traffic (HTTPS)
Cloudflare Origin CA certificates are intended for HTTPS websites behind Cloudflare.
Other services (like mail servers, direct IMAP/POP/SMTP, or other non-HTTP services) may require different certificates depending on your configuration.
3) Wildcards Are Optional
If you use many subdomains, you may want to include a wildcard hostname:
*.example.com
Otherwise, you can list only the specific hostnames you use.
Quick Checklist
✅ Cloudflare proxy (orange cloud) is ON
✅ Origin CA certificate created in Cloudflare
✅ Origin certificate + private key saved
✅ Certificate installed in hosting panel
✅ Certificate assigned to the domain
✅ Cloudflare SSL mode set to Full (Strict)
If you need assistance, please open a ticket.
Was this article helpful?
That’s Great!
Thank you for your feedback
Sorry! We couldn't be helpful
Thank you for your feedback
Feedback sent
We appreciate your effort and will try to fix the article